bubbles and sparkle nail ♡


Today, I have a summery sweet nail art to show you ♡
It's super easy,
you just apply the base coat 3-4 times 
to make your nail look healthy and pink,
then add tiny dots with all the colours on the tips.
I added 2 thick coats of top coat afterwards to make it look super squishy like jell polish ♡


Colours Used
Base coat: Rimmel Try Harder Double Duty base Coat
Shimmery blue: Sinful Colors#1106 Cinderella
Silver Flecks: TiNS#701 Photogénne 
Baby pink: Essie#706 neo whimsical
Holographic pink glitter: Milani 3D Holographic #513 Digital
Top coat: Seche Vite dry fast top coat

What do you think??

Party nail ♡

Hi everyone ♡
Today, I have the perfect party nail to show you :)

I was looking through old pictures  for inspiration,
and found this beautiful monotone glitter mani I was wearing for a Halloween party last year!!
I think it would look perfect for a summer party too,
the glitters look AMAZING in the sun!!!!


Colours Used
Base coat: OPI#NT T10 natural nail base coat 
Silver: China Glaze#1118 Glistening Snow
Black: NYC Smokey Topcoat #001 Rock Muse
Top coat: Seche Vite dry fast top coat


The silver glitter polish, Glistening Snow, is from China Glaze Holiday Joy collection (2012).
It is packed with fine silver and holographic glitters
that just glistens so beautifully like a mirror ball!!

I think I used 4 coats for each colour.

 You're only using  2 colours, yet the glitters make such a chic statement!!
I think any glitter mani look best packed in a thick top coat, and under the sun ♡
What do you think??


Colours Used

- See more at: http://alittleblogbyayaka.blogspot.co.uk/#sthash.8LP6WeuO.dpuf

Colours Used

- See more at: http://alittleblogbyayaka.blogspot.co.uk/#sthash.8LP6WeuO.dpuf


It

soft shimmery nails using Sinful Colors ♪♪

Sinful Colors - Cinderella, Social Ladder, Glass Pink
Hi everyone!
Today, I have another swatch for my latest Sinful Colors purchase ♡


✤ Colours Used ✤
Sheer white: OPI#NL T52 Don't touch my tutu
Shimmery pink: Sinful Colors#924 Social Ladder
Pearly white: Sinful Colors#112 Tokyo Pearl
Essie#645: my place or yours
Top coat: Seche Vite dry fast top coat


Here is a close up of the marble ♡
What do you think??
- See more at: http://alittleblogbyayaka.blogspot.co.uk/#sthash.ls3jYHvS.dpuf

Colours Used


Shimmery blue: Sinful Colors#1106 Cinderella
Shimmery white: Sinful Colors#924 Social Ladder
Shimmery pink: Sinful Colors#376 Glass Pink

Top coat: Seche Vite dry fast top coat

Cinderella
 This is such a soft & pretty blue, perfect for the name Cinderella!
It is sheer and semi-jelly, 
with pink shimmers.
I needed 3 coats for the pictures above,
but it still reflected the colour of my nails.
I wonder if this looks more Cinderella-like,
if layered over a sheer white jelly polish. 
That way, you might not have to layer so much,
and soften the blue colour even more.

Social Ladder
This is a soft, pinkish white hue with gentle pink shimmers,
perfect for a classic, elegant mani!!
The formula was runny, easy to work with and very sheer.
I needed 4 coats for the pictures above,
and dried pretty slowly.
The end result is totally worth the wait though,
it's so sweet and lady-like at the same time!!

Glass Pink
This is very similar to Social Ladder,
but more on the pink side,
with silver and pink shimmers that are a little stronger than Social Ladder.
The formula was a little hard to work with,
and I used 4 coats for the pictures above.
You can still see through the colours though.
I know I'm a sucker for soft shades,
and I own A LOT of them,
but this could become one of my favourites!!
It is that pretty ♡
 
Left: Social Ladder / Right: Glass Pink

Can you tell the slight difference??
 I absolutely love them both ♡


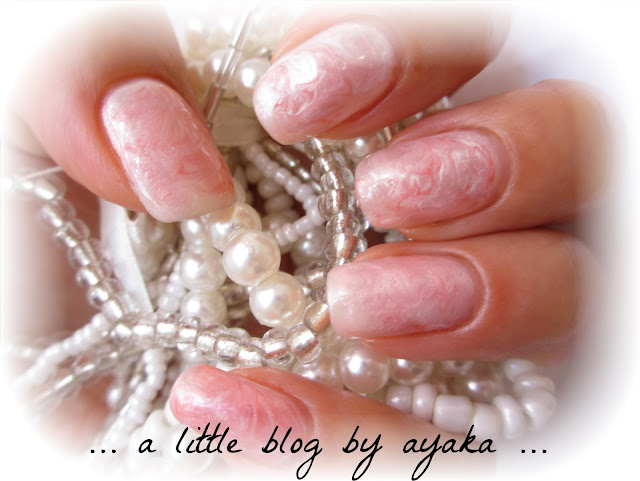
pink & pearly marble ♡


Hi everyone!
Here is another post for my newly purchased Sinful Colors polishes ♡


Easy steps to create this look...
1. Apply base coat.
2. Apply 1 coat of sheer white polish to create a canvas.
3. Apply shimmery pinkish white polish.
4. Before this dries, quickly drop 3-4 small drops of pearly polish and dark pink polish.
5. Using a toothpick or a thin art brush,
gently drag the dots into random marble patterns.
(Be careful not to press too hard, the brush will scrape off the base colours and reveal your nail)
5. Apply top coat.

✤ Colours Used ✤
Sheer white: OPI#NL T52 Don't touch my tutu
Shimmery pinkish white: Sinful Colors#924 Social Ladder
Pearly white: Sinful Colors#112 Tokyo Pearl
Essie#645: my place or yours
Top coat: Seche Vite dry fast top coat

Here is a close up of the marble ♡
What do you think??


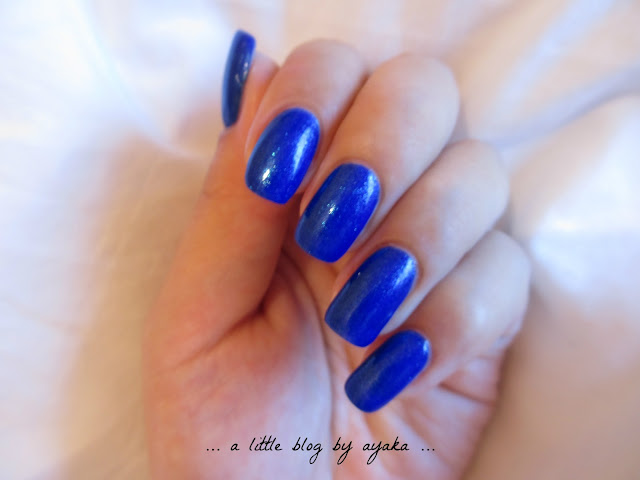
Sinful Colors: Blue By You

Hi everyone!!

As I have just purchased 10 new polishes from Sinful Colors,
I'll be doing a swatch today.

The colour I'm wearing is
Sinful Colors#1100 Blue By You.

It is a deep cobalt blue with greenish shimmery undertone,
which makes it shine like deep sea water.
 It's beautiful, 
and I think it makes your skin look fairer.

The formula was very thick and difficult to clean up around the cuticles.
Despite the gel-like formula, however,
 you only need 2 coats for full opacity, which was very impressive!!
 I would advise using this with a nail polish thinner,
and a good base coat!!
With a colour so deep,
you should never ever leave out the base coat!!
 
I think this is the perfect blue for a day by the beach♡ 

Sinful Colors#1100 Blue By You

White Pull & Bear dresses for the summer ♡

Hi everyone!!
Today, I have the prettiest 2 white dresses to show you!!
I bought them in Pull & Bear on Bond Street,
and they were on SALE!! 
cutwork embroidery white dress ♡


chiffon combinaison with lace and fringe details with low-cut back ♡
What do you think of them??
They were very detailed,
perfectly sewn,
and  £19.99 each ♪♪

If you remember my post from here,
I've shown you my must-buy bracelet and wedge sandals for the summer.
I think these beauties would compliment these dresses perfectly ♡♡♡


£14.90
£14.90
£14.90

polish shopping: Sinful Colors ♡


Today, I am very very excited to show you my latest shopping spree at Boots!!
I recently discovered that Boots started selling Sinful Colors in the UK,
and for £1.99 each!!
I could've ordered them online,
but was too eager to see them in person,
so I rushed to the biggest Boots I know!!!


I had done a backup research and had a biiig list of must-have hues,
and boy was I pleased to find out that the store had most of the colours that I wanted!!

And oh.... not only do they have a great line-up of colours,
Boots currently offers a "Buy 1 get 2nd 1/2 price!!!!!"
I bought 10 polishes and it was only £14.90,
can you believe it???

I feel like the luckiest girl in London♡

This is the list of polishes I purchased today♪♪
✤Shopping List✤

(TOP left → right)
Sinful Colors#102 Purple Diamond
Sinful Colors#376 Glass Pink
Sinful Colors#924 Social Ladder
Sinful Colors#112 Tokyo Pearl
Sinful Colors#101Snow Me White

(BOTTOM left → right)
Sinful Colors#830 Pinky Glitter
Sinful Colors#831 Hottie
Sinful Colors#1100 Blue By You
Sinful Colors#1106 Cinderella
Sinful Colors#947 Mint Apple

I cannot wait to try them all out♡
Keep your eyes open for the swatches♡♡


✤Shopping List✤
(TOP left → right)
✤Shopping List✤
(TOP left → right)

✤Shopping List✤
(TOP left → right)
Zoya#ZP244 Mia
Zoya#ZP660 Nyx
Zoya#ZP659 Vespa
Zoya#ZP661 London
Essie#473 sugar daddy
Essie#710 van d'go
Essie#722 haute as hello
Essie#942 penny talk
(BOTTOM left → right)
OPI#NL T56 Lights of Emerald City
OPI#NLT60 Which is Witch?
OPI#NL T61 I Theodora You 
OPI#NL T52 Don't Touch My Tutu!
OPI#NL T55 Pirouette My Whistle
OPI#NL E74 You're Such a BudaPest
OPI#NL E73 Suzi's Hungary AGAIN!
- See more at: http://alittleblogbyayaka.blogspot.co.uk/search/label/%E2%9C%BFShopping%E2%9C%BF#sthash.ByztC9PK.dpuf
£5
£
£
£
£5
£
£
£
£

Models Own: Grape Juice ♡


Today, I'm wearing Grape Juice,
a pink-toned, sweet lilac cream from Models Own.
This is another shade from their scented Fruit Pastel Collection!!
Yesterday in this post for the review of Blueberry Muffin, 
I said that I wanted to get Banana Split.
I went to the store and came to the realisation that it would just clash with my skin tone.
 So I settled for this colour instead.

Result??
I love the colour and I love the scent (that smells nothing like grape juice, but I like it anyway) !!

It's just the really thick consistency that's really really annoying!!
I prefer any polish jelly or cream to be runny, sheer and buildable,
 so I can control the colour density.
Also, runny polishes are far more easier to deal with 
compared to a thick, gloopy polish  that results in uneven finish.

What do you think of the end result?
Do you think it's worth having to deal with a gloopy polish??


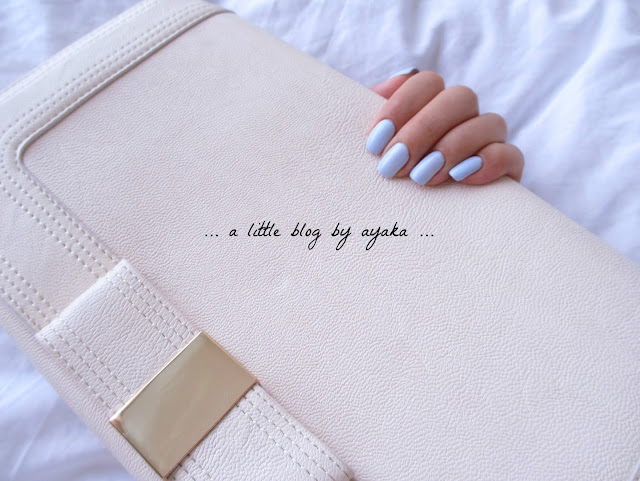
Models Own: Blueberry Muffin ♡

Today, I'm wearing a scented nail polish from Models Own in the shade of Blueberry Muffin!!
Yes, scented!!!
This is one of the five scents / colours they have in their Fruit Pastel Collection.

Blueberry Muffin is a clean shade of delicate baby blue,
which leans a little on the grey / lilac side depending on the lighting.

I applied 3 thick coats to reach the opacity of the bottle and a smooth surface.
After the first coat,
which seemed to be an easy application,
the polish started to become thick and make streaks,
so the 2nd and 3rd coat had to be pretty thick.

As with the scent that I was very very excited to smell in person .......
Well, let's just say that the sweet smell of Blueberry Muffin 
does not cancel out the usual smell of polishes when the polish is still wet!!
Having said that though, once it had dried,
only the sweet smell remained,
even after a thick coat of Seche Vite dry fast top coat ♡


So was it worth the £5??
I'd say yes!!
The pastel colours are all sweet,
and I cannot wait to try out other scents,
especially the cream yellowed Banana Split.... ♡
 This is a shot with my favourite clutch bag from Forever 21♡
Yes, I know the bag looks HUGE,
but it's only because my hand is small.
Like, baby small.


watercolour nails


Hi everyone!
Today, my nails are in a summery watercolour shade :)

I've been seeing several watercolour nail tutorials online,
and have been dying to try them on my nails!!

Easy steps to create this look...
1. Apply base coat.
2. Apply 2 coats of white polish.
3. Apply top coat.
4. When it's dry, apply a blob of polish on your nail.
5. With a paint brush that's been dipped in acetone or nail polish remover,
dab on the blob of nail polish and smudge the edges.
6. Continue the same blob & smudge process with different colours.
7. Apply top coat.

✤ Colours Used ✤
White: BarryM#66 Matt White
Purple: OPI#NL E74 You're Such a BudaPest
Pink: OPI#NL E73 Suzi's Hungary AGAIN!
Pastel Green: BarryM#304 Mint Green
Top coat: Seche Vite dry fast top coat
Left

Right

What do you think?
 
On my left hand, 
I tried it with a lot of nail polish and the white base colour is barely showing.
On my right hand, 
I  tried it with less nail polish and a lot of white remaining.
In this case, I think we can say that less is more, 
so if you ever want to try this nail art,
make sure you'll leave the white base colour still visitble!!


orange flower nails

This is how my nails look today♡

Easy steps to create this look...
1. Apply base coat.
2. Apply 4 coats of orange.
3. After the base colour is dry, use a dotting tool and create flowers with the white nail polish.
4. Use a smaller dotting tool and paint the middle of each flower with the glitter.
5. Apply top coat.

✤ Colours Used ✤
 Orange cream: Essie#722 haute as hello
White: BarryM#66 Matt White
Gold glitter: China Glaze#1114 Champagne Kisses
Top coat: Seche Vite dry fast top coat


Do you like it??
It's so easy, and the bright orange looks vibrant in the sun!!
I also love the bronze-ish gold glitter of Champagne Kisses,
this polish looks best when you cover it in gel-like top coats♪


essie: haute as hello


【name】

Essie#722: haute as hello

【colour】

creamy pastel orange with a hint of neon

【formula】

opaque in 3 coats /fast drying / streaky at first /
runny consistency but the colour builds up easily /  matte finish like any neon

【collection】

essie summer collection 2010

【note】

 I thought the end result was a bit more neon than the colour from the bottle,
it is a perfect colour in-between neon and pastel♡
It makes your skin look tanned,
so perfect for the summer season!!
On the other hand, it's totally unwearable in the autumn/winter...

This is how the polish looks after 1 coat


Res - cuticle with Sally Hansen♡

Today, I have a product review for you!!
Sally Hansen - Gel Cuticle Remover -

I read a lot of nail polish blogs,
not just because I adore their swatches, amazing nail art skills and beautiful nail shapes.
More than anything,
I just can't stop staring at their perfect cuticle lines... !!
They look so neat, clean and pretty♡


So today, 
in the hope of getting a clean cuticle like a professional nail blogger,
 I will be doing a product review of Sally Hansen's Gel Cuticle Remover♪♪


First, I applied this on my cuticle line and let it work for 2 mins.
Then, using an orange wood stick,
I gently massaged and pushed back the cuticle.
After that, I washed it thoroughly with warm soapy warter.


Before

After 1 use
See how clean and well-kept the cuticles look after just one use??


It was my first time ever using a cuticle remover,
but I realise now how important this is to keep your nails looking healthy!!
I'm definitely going to continue this from now on!!

You only have to use this 1-2 times a month,
and for £6.95, I think it was definitely worth the money!!
I've used this on my toe nails too,
and I couldn't believe all the excess cuticles that came off!! (gross!!)

I definitely recommend this product :)

foggy pastel nails♡

Today, my nails are looking pretty girly, even for me :)
It's pastel, it's sparkly, and it's covered in foggy top coat♡
I absolutely love the outcome!!

Easy steps to create this look...
1. Apply base coat.
2. Apply 3 coats of base colour. 
(baby pink on ring finger, baby blue on all others)
3. Apply 2 coats of glitter top coat.
4. Apply 1 coat of matte top coat.
5. Make sure you wait for your nails to dry completely, 
matte top coats take much MUCH longer to dry than your usual dry-fast top coats!!

✤ Colours Used ✤
Base coat: Base coat: OPI#NT T10 natural nail base coat
Baby pink: Essie#706 neo whimsical
Baby blue: NYC#325 Raindrop
Glitter: NYC#155 Gramercy Glitz
Matte top coat: Rimmel Matte Finish Mattifying Topcaot


What do you think??
I think matte top coats make any pastel colour look like sugared sweets ♡


everything that compliments pretty nails

Today, I made a wishlist for products that will compliment a summer-ready mani&pedi ♥
What do you think about them??
All products can be found here at Shopcade.


Bracelet from Banana Republic

Striped Wedges from Dorothy Perkins
Lemon Body Butter from The Body Shop
Since I started my blog,
I have been painfully aware of how important it is to moisturize your hands and cuticles :(
A night without a cuticle oil / hand cream makes such a big difference the next day,
especially when you're trying to take a super macro picture of your nails.

I am a firm believer of the body butters from The Body Shop,
I have tried countless scents on my hand and body,
and the next scent I definitely would like to try is this lovely and refreshing Lemon♥
The bracelet and wedges are also on the top of my wishlist!!
They would look soooo good with a summery white dress,
I'd love to go on a holiday rocking these items!!!

 
As some of you may know, I am currently registered at Blogger Network.
If you are a blogger in the UK, I recommend signing up ASAP!!
It is completely free to join, it's easy,
and they are currently hosting a competition with Shopcade and Asos ♥
For more details on the competition, visit Blogger Network here.


⋈ ribbon nails ⋈


Hi everyone!!
Today, I have a picture that I found in my photo album.
Old photos are the best source of inspiration for me,
I have millions of my past nails and designs I've found online,
and I spend AGES just browsing through my collection ♥
They make me so happy♪


So, does this nail look familiar?
I've used the same colours as I have on my first ever blog post here 
For the bow on my thumb,
I cut out a scotch tape and stenciled the silver polish on,
then removed the scotch tape when the polish was half dry.
(I found out that if the polish is too dry or too wet,
the scotch tape pulls and messes up the bow!!)

✤ Colours Used ✤
Base coat: OPI#NT T10 natural nail base coat
Silver Flecks: TiNS#701 Photogénne
.Top coat: Seche Vite dry fast top coat


zoya: mia


【name】

Zoya#ZP244 mia

【colour】

dusty rose/ perfect for all skin tones / so elegant and lady like ♥

【formula】

a little thick / opaque in 1 coat / need 2 coats to even out the streaks

【collection】

Zoya classic collection


I have used this colour here on my leopard nails :)


blue ombre nails

Today, I tried a gradient nail, in a refreshing blue and sparkly top coats.
It looks so pretty under the light,
it's a shame my camera couldn't quite capture the sparkles too well :(

Easy steps to create this look...
1. Apply base coat.
2. Using a sponge, dab a shimmery light blue on the top 1/2 of the nail.
3. When the first coat has dried, repeat the same process, this time onto the top 1/3 of the nail.
4. Repeat the same process onto the top 1/4 of the nail.
5. Apply a glitter top coat.
6. Apply another glitter top coat with finer glitters.
7. Apply a soft pink jelly to smooth everything out.
8. Apply a quick-dry top coat.

✤ Colours Used ✤
Base coat: Base coat: OPI#NT T10 natural nail base coat
Shimmery periwinkle blue: 2true Glossywear Nail Polish #48
Big glitter: NYC#155 Gramercy Glitz
Finer glitter: TiNS#017 the aurora mist
Pink jelly: Rimmel try harder double duty base coat
Top coat: Seche Vite dry fast top coat


What do you think?
Beneath the glitters, the blue polish looks almost grey/silver. 
The different sized glitters look so pretty with the pink jelly adding depth to everything.
It's a lovely colour to cool your finger tips on a hot summer day :)
I just wish we had more sun in London!!


polish shopping: ready for spring & summer

Hi everyone :)
Today's post is about my latest shopping spree♥

Every now and then, 
I get the high-end nail polishes shipped from the USA from this site.
They are aimed for Japanese users,
but have kindly agreed to ship them to the UK when I've asked.
The good thing about this site is that they sometimes have 20% off and free shipping deals!!
So I wait patiently until these deals come up,
and splurge!!
(That doesn't mean that I can resist all the temptations in my local Superdrug though....)


✤Shopping List✤

(TOP left → right)
Zoya#ZP244 Mia
Zoya#ZP660 Nyx
Zoya#ZP659 Vespa
Zoya#ZP661 London
Essie#473 sugar daddy
Essie#710 van d'go
Essie#722 haute as hello
Essie#942 penny talk

(BOTTOM left → right)
OPI#NL T56 Lights of Emerald City
OPI#NLT60 Which is Witch?
OPI#NL T61 I Theodora You 
OPI#NL T52 Don't Touch My Tutu!
OPI#NL T55 Pirouette My Whistle
OPI#NL E74 You're Such a BudaPest


I just keep staring at the bottles,
they're soooo pretty.... ♥
Very Spring/Summer shades, don't you think???


MUA: pistachio & pink


Today I have the two sweetest little nail polishes from MUA ♥
The bottles are tiny ( and completely look like Essie )
but they are just so sweet!! and only costs £1 each ♪♪
I have a feeling I'll be collecting these little gems!! :p


✤ Colours Used ✤
Hot pink: MUA bright pink
Mint creme: MUA pistachio ice cream
(I've applied 3 coats with both colours)


blue sugar nails


Today, I'm wearing Nyx; a textured polish from the PixieDust Collection by Zoya♥
As I have said on my post on Vespa, I absolutely love love LOVE Zoya's textured polishes... 
The glitters are fine, elegant, matte yet beautifully shimmery under the sun,
the most perfect kind of textured polish you could ever want in my opinion!!
At the moment, I only own polishes from their first PixieDust Collection,
and I just cannot wait to get my hands on their Summer Edition and their Fall Edition!!

✤ Colours Used ✤

Zoya#ZP660: Nyx